Tuesday, September 11, 2012

Sibling and Dad Gifts for When the New Baby Arrives

This weekend I've had so much fun working on big brother kits and a (not so) new dad kit to give the boys when baby #4 arrives. You can check out my inspiration herehere, here, and here.

Here's what each kit consists of:

For Little Man (who I plan to start calling June Bug because he's no longer the littlest. It's an appropriate Southern term for my very ornery 2 year old who was after all born in June.):
  • Favorite snacks/candies and an Elmo snack/sandwich container he was oogling at the store.
  • Horizon brand organic strawberry milk (doesn't have to be refrigerated!) or juice boxes
  • Dollar store busy toys including a giant dino coloring book, re-stickable wall decals, Cars the movie magnets, Crayola Twistables slick stix, and a magic wash cloth. (All found at Walmart)
  • A homemade car wallet like this one and a new set of cars to fill it.
  • big brother T-shirt
  • A little homemade doll because he's at that age where he copies everything and loves to "help".
  • A homemade felt quite book (TONS of ideas on Pinterest)
  • And I may add a disposable camera
For My Older Boys:
  • Snacks and milk
  • Their digital cameras
  • Big brother T-shirts
  • Mini photo albums to put in any pictures they take of the day
For the T-shirts: the youngest is getting one that says "I'm the Big Brother", the next oldest is getting, "I'm the Bigger Brother", and the oldest is getting, "I'm the Biggest Brother". I ordered the decals from this etsy shop and put them on some craft store T-shirts. She was quick to respond to inquiries and the product was shipped within a couple of days. The service was outstanding. (Note: The colors turned out to be somewhat translucent. I recommend WHITE t-shirts, but they're still cute.)

I wrote a letter to each of the boys to tell them how special they are and how much I love each of them.

They are also each getting a photo book inspired by this one. I haven't started those yet though...

For Strong Man, I made him a T-shirt and baby bib set inspired by this one, a "diaper dootie" tool box kit, and included some retro sodas with these free labels added, a couple of good cigars and a copy of "Just Me and My Dad" from the little critter series.

Backing up a bit...Dad's shirt says, "I Make Adorable Babies" and the bib says, "Adorable Baby." So as not to leave out the other boys who were of course also adorable babies, I made the gift tags on their big brother kits look like awards ribbons- using microsoft clip art and laminated them with contact paper. I picked up some self adhesive pin backs in the craft section at Walmart that I adhered to each and attached them to the gift bags. (Which are re-useable lunch bags found clearanced for 25 cents each!) So they each have little badges that say, "Adorable Baby #1", "Adorable Baby #2", and "Adorable Baby #3". 

Now for Strong Man's "diaper dootie" kit. This was fun. I had seen some new dad survival kits on Pinterest and Amazon so it's based off of those. I collected most of what went in it from around the house so it was practically free. (Love that!) I even had the little tool box already. Here's what went into it...
  • New born diapers
  • Wipes
  • Butt Cream
  • Alcohol wipes
  • Vaseline
  • Baby powder
  • Hand sanitizer
  • Homemade Pee Pee Tee Pee
  • Goggles
  • Face mask
  • Ear Plugs
  • Tongs for diaper disposal
  • Clothes pin for the nose
I made a copy of the above list and mod podged it to the top and made a cute label for the front using Microsoft clip art and word art. 


Zachary's Birthday Book

For each of the boys, I am creating photo books about their birthdays and them as babies to include in their big brother kits for the hospital when baby Jackson is born. The idea came from this Pin which is absolutely gorgeous. I didn't want to buy the templates though and didn't want to take time to make my own so I just used the idea pages on Shutterfly, making small modifications here and there to adjust the number of pictures on some pages. I love making photo books online. No scrapbook supplies to clutter up the house and it gives you such a nice clean finished product. Here and here are two excellent ideas for overall photo organization using photo books. I also love electronic picture frames for displaying lots of photos without the clutter.

PS Today and tomorrow Shutterfly is offering a FREE photobook with the code SUMMERBOOK. So if you have a project in the works, now's the time to finish it up. It's a $30 savings! (I have no affiliation with Shutterfly. I just really like their products!) They offer this deal a few times a year so I do recommend signing up and receiving their emails so you can be notified the next time it comes around.


You'll love Shutterfly's award-winning photo books. Try it today.

Friday, September 7, 2012

What you really NEED for a new baby and my hospital packing list

My pregnancy will soon be coming to an end with baby #4 due in just five weeks (agh!). It's time for me to review my registries, and lists of things we need, and start packing for the hospital. It's tough to shop for a new baby, even for experienced mamas. There is so much out there and new contraptions are coming out all the time that are just so cute or look so useful. Here's my list of must haves, and then my list of wants- things that would be great and useful but not absolutely necessary, and then there are the things you really don't need at all. Admittedly there are probably some things on my list of must haves that others might say aren't needed. Everyone is different. Compare lists and make your own decisions. If you think of anything I missed, please leave me a comment and let me know!

Must Haves for a New Baby:

(Note: I've found that clothing and blankets are very popular gifts so don't buy too much! You'll likely end up with an over abundance of tiny clothes.)

Layette:

  • Clothes: plan on about 3 outfits per day for as long as you prefer to go between washes. (Babies can be messy!) Keep most of it simple- onsies, sleep-n-plays, and gowns and don't get too much in newborn sizes because they grow so fast! Some bigger babies never fit a newborn size.
  • 2-4 sleep sacks
  • 4-7 socks and/or booties and mits so they can't scratch themselves with those itty bitty very sharp nails.
  • 2 small bibs- my first 2 weren't droolers so these were never used but I needed 3-4 a day for my 3rd
  • 2-4 knit hats
  • sweater or jacket appropriate for the season
  • small hangers
  • 10 receiving blankets or the new muslin/gauze swaddlers that everyone's raving about.(can double as burp cloths)
  • 10 burp clothes (I prefer the flat cloth diapers)
  • 2 thicker blankets

Nursery:

  • Crib and mattress (unless you plan to exclusively co-sleep)
  • Some kind of portable crib/co-sleeper/play yard/bassinet. (I recommend at least one of these so you can keep baby close.) There are some very cool portable pop-up versions available now.
  • 4 fitted crib sheets
  • 4 bassinet sheets
  • Water proof pads
  • Dresser
  • Contoured changing pad with 2 covers
  • Hamper

Feeding:

  • Breast pump. Even if you plan to bottle feed, you'll want a small manual pump (I have used and recommend either the Medela or Aveeno.) to relieve pressure in the first days.
  • Milk storage bags
  • Nursing bras and/or tanks (Target has good reasonably priced ones.)
  • Nursing cover- you can use anything from a receiving blanket to scarf. This time around I made a couple of  these ponchos out of beautiful brocade that can quadruple as car-seat, stroller and bassinet covers.
  • Re-usable nursing pads
  • Earth Mama Baby Angel Nipple Butter or Lanolin
  • The number for your local La Leche league or the hospital's breast feeding support- just in case
  • Bottles- If you plan to bottle feed or give pumped milk. Every baby prefers a different bottle so get one or two of several different styles before buying too many of any one. I like these and these.
    • Bottle brush, drying rack and dish washer rack
  • For later:
    • ice-cube trays for homemade baby food, or this.
    • spoons/sippy cups/plastic or other unbreakable bowls/plates (They will get thrown!)
    • space saver booster seat

Diapering, Bathing and First Aid:

  • Newborn and size one diapers
  • Wipes (regular or cloth)
  • Cloth diapers if you want to go that route- and there are many reasons to! But that's a whole other post. Minimum about 2 dozen pre-folds and 4 covers for every other day washing plus 2 good night-time AIOs with extra absorbency. (Fuzzy Buns is a good choice.) 
  • Cornstarch based powder
  • Diaper Cream (Be careful of the type if cloth diapering! With little man we rarely had to use it...instead we used powder regularly and when he did develop a rash, a homemade wipes solution cleared it right up. 1c. water mixed with a splash of olive oil and a few drops each of tea tree and lavender essential oils. Just spray it right on and wipe off with a soft cloth wipe then allow his bum to dry completely before diapering.)
  • Baby wash (I like California Baby)
  • Baby lotion (I like Shea Moisture Organic Raw Shea butter lotion available at Target)
  • Ear thermometer
  • Nail clippers
  • Gas drops
  • Motrin
  • Nasal aspirator
  • Comb and/or brush
  • Alcohol for the umbilical chord

The Rest:

  • Car seat (either convertible or an infant carrier with an extra base if you have more than one vehicle)
  • Piddle pad for the car seat (babies are messy!)
  • Carrier- whether it's a homemade sling, wrap, mai tai, Moby or Ergo, there will be times when you are at the grocery store and baby just wants to be held, or nursed. Some kind of carrier is invaluable in these situations.
  • Some kind of swing and/or bouncy seat. I just ran across this the other day and I think it would be an excellent multiple use choice but I don't have one so can't attest to that 100%. Little man slept in his swing for the first 2 months.
  • Stroller- not to be confused with a huge fancy travel system. Just a nice simple umbrella stroller, as long as it has a 5-point harness and reclines, will do fine. I have this one and love it.
  • Lidded trash can for a diaper pail
  • Monitor
  • Diaper bag or tote preferably with lots of pockets
  • Night light for the nursery- for night-time feedings, etc. You never want to turn on the overheads and totally wake everyone up!
  • Free and clear laundry detergent and blue dawn dish soap for stains
  • Rear view mirror so you can check baby while driving

Things that would be great but aren't necessarily absolutely needed:

  • Wet bags- little draw string water proof bags to keep handy in the diaper bag for soiled clothes. A must if cloth diapering though.
  • Memory Book
  • Crib Mobile- some kind of crib toy is nice to sooth baby. Here's one that fits on a pack-n-play or car-seat. This is the one I've been wanting.
  • Pack-n-play- goes under the bassinet/portable crib category mentioned earlier. They do come in handy for containing an older baby when needed- if he'll stay in it without screaming. My first 2 did, 3rd wasn't having any of it...
  • Moses basket- great for portability and super, super cute but definitely not absolutely necessary
  • Excersaucer or walker (but you don't need it until they're a little older...)
  • Activity Gym- I made one based on this tutorial but with a simple square mat. (Post about that still to come...) This looks like an excellent, cost effective and space saving option.
  • Glider/Rocker- not absolutely necessary but very nice to have! I highly recommend a super plush upholstered version that you can nap in with baby, especially when baby is sick...
  • Boppy or other nursing pillow. I didn't have one with the first two and found the one I had with the 3rd to not work well. He kind of laid in the crack between it and my body and was too low. But other moms swear by them.
  • Baby tub- really nice for the first 3-5 months or so- after that we just bath in the kitchen sink or regular tub, which works in a pinch for younger babies too.
  • Car seat protector- this fits under the baby's seat and protects the car's upholstery. It might save you some extra cleaning. I've never used one though.
  • Toys- don't need them until baby starts grasping. I am a sucker for anything made by Green Sprouts, Plan or Haba.
  • Safety gear (outlet plugs, gates, door latches, etc)- you will need them, but not until baby is mobile- around 4 months
  • Nosefrida I haven't used one through 3 babies so I left it on the want list, but have been hearing very good things and definitely plan to try it this time around. Update: I was a little unsure once I figured out how this is used, but it works very well! Way better than the standard bulb syringe. 
  • Muslin or cotton gauze swaddle blankets- again, this is a fairly new product that I haven't tried out yet but people are raving about. Update: Love these!
  • A good camera to take pictures of your new little one.
  • A big stainless steal insulated water bottle for mom.
  • Music and lullaby CDs- I love to sing along when putting baby down for the night.
  • Fresh food feeders- the man who invented these is a genius.
  • Nursing necklaces- fun for mom and baby :)
Here's a great Amazon list to check out...
Here's a great one as well as other good advice for the more minimalist, or natural minded mom from Code Name Mama, "As long as you have a breast and some way to hold the baby, you’re usually going to be ok." I love her list of practical things to "register" for instead. 

Things you really don't need at all:
  • Changing table- use a contoured changing pad on the top of a dresser and use the top drawer to organize diapers, wipes, creams, etc.
  • Wipes warmer
  • Bottle sanitizer
  • Pacifiers- big no no if breast feeding, especially in the beginning if baby's having trouble learning how to latch on. Later, well, some like 'em, some don't. None of my boys have used them. Little man did a bit at first but quickly decided he preferred the real thing. If you decide you need some, this is my personal favorite.
  • Baby wash cloths and hooded towels- cute, but you can use regular ones.
  • Diaper genie- they don't work well and are kind of a pain. Just use a lidded trash can and take it out every couple of days.
  • Diapering organizers- use the top drawer of the dresser. Or any basket or caddy will do if you want something mobile.
  • Crib bumper and comforter set. They look nice in the nursery, but they're for mom, not the baby. You can't use the thick comforter for him and now they say bumpers aren't entirely safe either.
  • High chair- they take up too much space. Get a booster seat such as this one. If you have the space however, this convertible chair would be a good option that could be used for years. 
  • Travel System- too big and bulky and really won't get used all that much. At least the one I had with my first baby didn't. As soon as he was big enough I got a $10 umbrella stroller and exclusively used that.

Last, some tips for saving money where you can:

  • Buy USED. Consignment sales, yard sales, thrift stores, craigslist. Babies rarely wear out their things before they outgrow them and there is nothing wrong with putting it to good use.
  • First buy what you NEED, then what you WANT.
  • Wait until after your shower to buy ANYTHING. 
  • Take your time and look for sales. Make a list!
  • Ask your friends if they have items you can buy or maybe even borrow for free.
  • Save baby's things to use next time. 
  • Don't forget to check etsy and local craft sales! You'll find beautiful one of a kind hand made items, sometimes for very cheap, and support a small business owner too!

The Hospital Bags:

So, now you've got all the stuff and are all ready to meet your new little one. If you are giving birth in a hospital or birth center you'll want to bring some things with you. You'll likely be in the hospital for 2 days after a vaginal delivery, or 3 (I think) for a c-section. I (try to) pack light, so here are the essentials, in my opinion...

For Baby:

The hospital will provide basic clothing, receiving blankets, pacifiers, diapers, wipes, Vaseline, alcohol wipes and other essentials for the baby during your stay. Make sure you load up on the "freebies" before you head home. (You'll likely be charged for them either way...)

  • A couple of gowns/outfits if you want baby to have his own.
  • A going home outfit (This doesn't have to be anything fancy unless you're planning a welcome home party, which I do not recommend. Everyone's going to be tired.) Make sure the legs are separate- no gowns- for the car seat to buckle.
  • 2 pair socks and mittens Update: I was unaware of the current recommendations- mittens and hats are no longer allowed because they are believed to be a SIDS risk. 
  • Hand sanitizer (homemade here) for mom after numerous diaper changes and siblings when they come to see the baby.
  • Comb and baby nail clippers- not always necessary but they don't take much room just in case.
  • Plastic bag or wet bag for bringing home soiled clothes
  • An installed car seat- the hospital will inspect it before they let you leave
  • A heavier blanket to tuck around baby in the car if it's going to be cold on the way home.
  • If you want, your baby book for foot prints
For Mom:
  • Picture ID, insurance card and any necessary hospital paperwork
  • Your birth plan if you have one
  • Sports bra for the birthing tub
  • Things to help you relax- classical music, lavender eye pillows, Hypnobabies tracks...
  • Snacks (My hospital's cafeteria food is barely edible.)
  • 2 nursing bras and/or tanks
  • Underwear (dark is good)
  • Flip flops for the shower, socks, slippers
  • 2 sets of comfy, loose fitting pj's. (I like yoga pants with a rolled waist and a nursing tank but consider a gown since nurses will be checking you for awhile and easy access is key.)
  • Going home outfit- again, keep it loose and comfy.
  • List of phone numbers for family to notify when baby arrives
  • Personal toiletries- chapstick, toothbrush, toothpaste, lotion, shampoo, conditioner, body wash, deodorant, hair ties, make-up, hairbrush, blow dryer, glasses/contacts, regular human size maxi pads, etc
  • Nipple cream or lanolin and nursing pads in case your milk comes in before you head home.
  • Camera!!
  • IPod/IPad/Laptop
  • Chargers/Extra Batteries
  • Cell Phone
  • A (dark colored) full size towel for the shower. You might not get more than a hand towel from the hospital.
  • Your own pillow if you're picky about that sort of thing. The hospital's will probably be hard and flat. Remember to bring it home with you!
  • Probiotics! In case you end up with a c-section or deliver in triage, (clears throat here...) and they decide to give you a round of "preventative" antibiotics this will help stave off yeast and thrush infections. I highly recommend either Dr. Mercola's Complete Probiotics (He has a kid pack too for those who, like me, can't swallow pills.) or Inner Eco coconut water kefir which is available at whole foods.
  • New Mama Bottom Spray 
  • Optional but fun: Sibling, New Dad, and Nurses Gifts. (Post coming soon...)
Now I'm heading over to Amazon to buy the rest of my "must haves", then time to start packing! Baby has dropped already over the last couple of days (Little man didn't drop until during labor and he was born exactly two hours after my water broke and 30 minutes after we arrived at the hospital.) so we MAY be looking at a slightly early birth, but no one can predict these things until they are happening. Prayers please that he doesn't arrive on the side of the road! I hope I can finish all my Pinterest baby projects before he shows up...

This post has been included in the Homestead Barnhop and Teach me Tuesday.

Thursday, August 30, 2012

Toddler Toy- Travel Dry Erase Pad Set

My project du jour was a case for the little man's dry erase pad and crayons.  It was inspired in part by this image on Pinterest. You could also use this design for an eReader, tablet, or other device, skipping the crayon pocket and adding a layer of batting for extra protection if desired.


Materials:
1/3 yd cotton print for outer cover
1/3 yd cotton print for liner
1" velcro
1/3 yd fusible interfacing

1. Measure the size of your pad, accounting for width and add 3/4" on the top, bottom and one side for seam allowances.

2. Cut out a rectangle from your liner fabric large enough to fold over the pad like a book, again accounting for width and 3/4"  seam allowances all the way around. (You'll see in the picture that I only did 1/2" seam allowance. You'll need the extra 1/4" at the end when you top stitch. I fudged by pulling up the stitching over the corners so I can still fit in the pad, but it doesn't look quite as nice.)


3. Cut out a rectangle from your outer fabric the same size and the inner. Set aside.

4. Cut out 5 squares with 3" sides. Fold 4 of them in half diagonally and iron. Set aside.


5. Figure out how big your crayon pocket needs to be by laying your crayons side by side and measuring the width, depth, and how tall you want it. I'm using chunky dry erase crayons that are 1/2" diameter and all of them together were 4" across. So for the width, I took the 4", added an inch for the diameter on each side, then another inch and a 1/4 for seam allowances. For the height, I wanted it about 3" tall. I added 1" for seam allowances (though I think 1/2" would have worked better here) so my slip pocket rectangles came out to 6 1/4"x4". (I didn't allow enough width the first time. The picture shows my smaller version before I re-did it.)


6. Cut out a piece of interfacing the same size as your pocket rectangles and iron it on to the wrong side of either one.

7. With right sides together, stitch around the edges of the pocket with a 1/4" seam allowance, leaving just enough open to turn.


8. Clip the corners so they'll turn out nicely.


9. Turn the pocket right side out, turning in the open edges and iron. Place it about an inch from the right side of the liner, and sew it down as close the the edge of the pocket as you can. Mine was about a 1/4".


10. Fold the pocket back on the seam, iron, then fan fold it forward again. Fold the other side of the pocket to match and stitch into place.


11. Sew along the bottom of the pocket.

12. Add interfacing and Velcro to your outer fabric. Set aside.


(Center the Velcro on a short side, 1" in from the edge.)

13. Retrieve 4 of your 3" triangles and fold one side under slightly, tucking in the corner on two on them.


14.  Place your triangles, on your cover, using your pad to measure placement. Your turned ends should end up in the middle of your cover liner. Remember I fudged and only left a 1/2" seam when there should have been 3/4" all the way around the pad.


15. Remove the pad, pin the corners in place, and place your outer fabric, right sides together on top of the liner, making sure the Velcro will be on the front, not the back like I did...

16. Starting at the end opposite the Velcro, sew all the way around with a 1/2" seam allowance, leaving just enough to turn and to insert a tab that will fold over to Velcro your cover closed.

17. Take your last 3" square and sew two sides, right sides together with a 1/4" seam allowance. Turn right side out and iron flat with the seam in the center.


18. Fold one end in about 1/2". Tuck the raw end into the opening on your cover and top stitch all the way around with a 1/4" seam allowance. (This is where I had to remove the top-stitching over the corner triangles because I couldn't fit the pad into the cover.)

19. Sew on the soft half of the Velcro to the tab, lining it up with the rough side on the cover.

20. Watch two year old immediately take everything apart while you are trying to photograph the finished product...


This post has been included in Teach me TuesdayAnti-Procrastination TuesdayMorristribe's Homesteader Blog Carnival and The Homestead Barn Hop.

Wednesday, August 29, 2012

Make a sheet saver for FREE

I have a two year old co-sleeper who is a very, very heavy night time wetter. I am sick of washing the sheets on our king size bed so I started looking into a sheet saver. This is the only one I could find that comes in a king size and it's over $50. Here's how I made one out of my worn mattress protector, for free...in about 30 minutes.


Materials:
Old mattress protector
Binding
Sewing machine with a walking foot

1. Lay out the mattress protector and cut off all of the side fabric, leaving the seams intact to avoid extra binding.

2. Fold it in half, head to foot and cut along the fold.

3. Fold one half in half, side to side and layer it on top of the other half with the folded end even with the end underneath then unfold so you have one long piece with the middle third overlapping.


4. Sew a big square all the way around the middle third to connect the two pieces. (If you want it completely water proof, you can add a layer of PUL, a baby lap pad or crib mattress cover.) Make sure you are using a quilting/walking foot on your machine because you are essentially sewing together 2 quilts. It's very thick but with a little guidance my old Kenmore handled it just fine. Broke the needle on the last stitch. How's that for timing? Ha!)

5. You should be left with one long raw edge. Bind it. And done!

Lay it across your bed and tuck in the ends. Now if you get a leaky diaper, just whip if off, throw it in the wash and tuck it back in. No removing sheets at all! Unless your little one has managed to squirm his way all the way to the foot of the bed, which is likely to happen at least occasionally... so make sure that the old worn mattress protector gets replaced with a nice new one sooner rather than later. Ask me how I know...


This post has been included on Teach me TuesdayAnti-procrastination TuesdayMorristribe's Homesteader Blog Carnival and The Homestead Barnhop

Tuesday, August 28, 2012

Simple Skirt for a Moses Basket

I have this great, very sturdy corn husk Moses basket that we picked up in Guatemala for $10, then added a mattress, stand, sheets...the whole deal was much more than $10 by the time it was all said and done, but it's such a sweet place to lay a new little one. I had made a skirt for it when little man was born but never was very happy with how it turned out. The hemmed edges rolled out in places and I had to add little Velcro sticky dots to get the whole thing to stay in place. Of course those don't work well with fabric so it just never hung quite right.


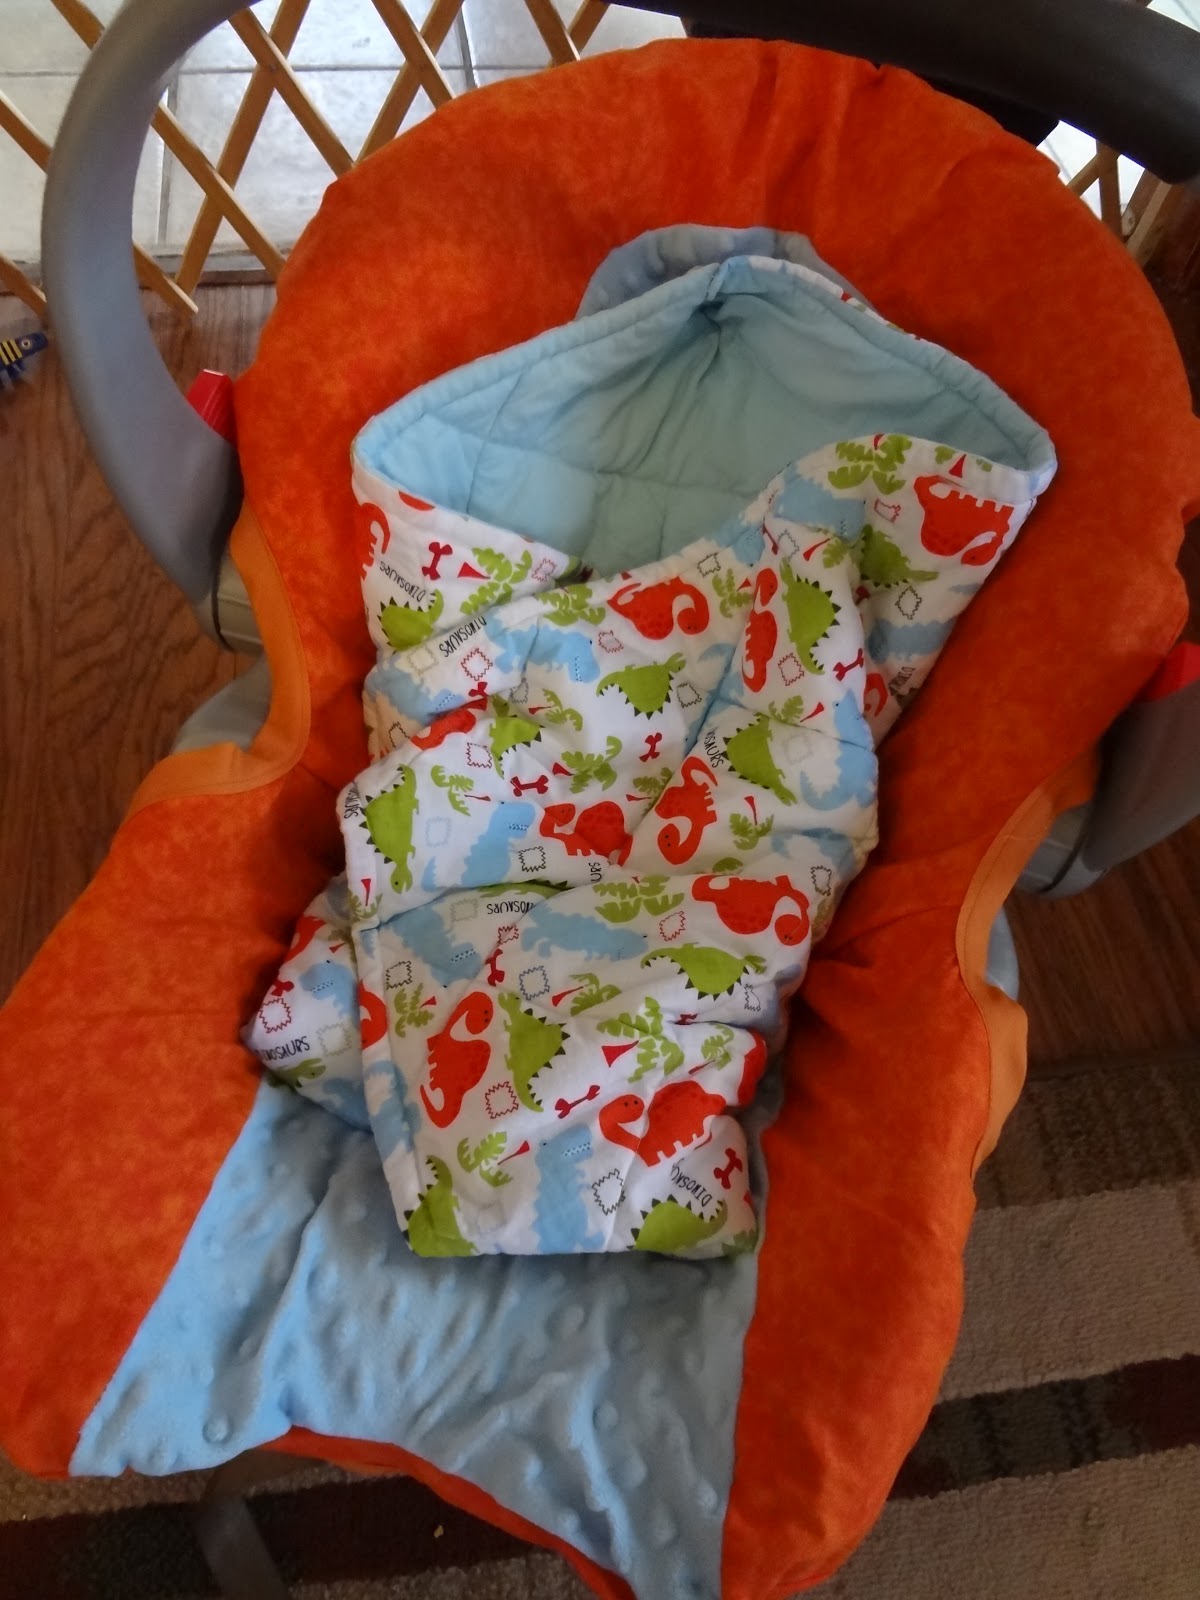
Soooo, now that we're having one more little guy, I decided to re-do the basket. Here's what it looks like now...


I decided to do it in pieces to make it more manageable. First, the skirt. (Sorry I didn't take any pictures of the process. I was too excited to complete it and I was a little nervous as to just how it would turn out.)

Materials:
about 1 yard of any fabric of your choice
6 yards of 1/2 inch double fold binding tape to match your fabric
3 yards of 1/4 inch elastic
1/4 inch wide ribbon

1. Measure the circumference of the basket.

2. Take that measure and multiply times at least 1.5. Take a yard of 45" fabric of your choice (I used a cheap cotton.) and cut enough 10" wide strips to equal your new length.

3. Sew the pieces together on the short ends using a french seam, or serger if you have one, so that you have one very long 10" wide strip.

4. Fold over 4" along a long side and iron all the way across. You'll use this crease later as a guide to sew on the elastic.

5. Bind both raw edges.

6. Sew elastic along the inside of the crease, stretching as you go to create a ruffle.

7. Fold the skirt over the elastic and tack on an approximately 8-10 inch piece of ribbon on one end.

8. Wrap the skirt around the basket to check the length. I ended up using exactly 3 yards of finished ruffle for my 84 inch circumference basket. (I know because I didn't buy enough binding for the whole length, but it ended up just right!)

9. Sew together the ends, again using the french seam. And you're done! If your elastic is tight enough it should sit in place just fine. If you want, you can add lengths of ribbon at what ever intervals suit you to tie it on.

Next, the bonnet...

Materials:
I used enough of my extra ruffle from the skirt to cover the arch of the bonnet, cut a couple inches short so the elastic will stretch and hold it in place.

Add: Another 12" or so of your fabric
        A length of elastic for around the back
        More binding. I used just a little over another 3 yards.
        3 lengths of 1/4" wide ribbon for ties

1. Sew the wider side of your existing ruffle to your extra fabric, again using a french seam.

2. Hang the ruffle in place over the arch and cut the hanging fabric where you want the bonnet to end. I cut mine around the middle of the top ruffle on the skirt.

Here's a good shot of the bonnet in process. You can see where I sewed the ruffle to the rest of the fabric right before I cut off the extra.
3. Cut a piece of elastic to wrap around the back and pin in place. Then remove the bonnet and sew on the elastic, again stretching it to create a ruffle. This part's tricky and honestly I just winged it and luckily it turned out pretty close to just right with no seam ripping involved.

4. Sew a length of 1/4" ribbon on at both sides where the bonnet will be tied on and in the center top where the elastic runs.

5. Bind the rough edges all the way around. Then tie on your finished piece.

Now the hard part is done. Congratulations! Next, let's make a bumper.

Materials:
About 3/4 yd of minky dot or another soft fabric of your choice times 2. (I made mine reversible using the                minky on one side and fabric from the old cover on the other.)

Plus: 3/4 yd. batting
        about 2 yds of 1/4 in. satin ribbon for ties

1. I kept using my outside measurement to do the bumper. This perfectly allowed for seam allowances. Take your measurement and divide by 4. Then measure your height from the mattress to where you want the top of your bumper. Mine came out to 4 rectangles that were 21"x8" each.

2. Lay one rectangle on your batting and cut out 4 rectangles of batting to match.

3. Cut out 8 approximately 10" pieces of ribbon. Fold them in half and pin at the half way mark along the long sides at the top and bottom of one of the fabrics.

4. Layer the fabric with the wrong sides together and batting on the bottom. Using the sandwich method, sew with a 1/2" seam allowance around 3 sides, leaving room on a short side to turn in right side out. Make sure while you're sewing that the ribbons are inside the sandwich and out of the seam.

5. After turning, top-stitch all the way around again with a half inch seam and turning in your opening. (I ended up whip stitching the opening too)

6. Lay the 4 finished rectangles end to end, overlapping by about 1/2". Cut 4 more 10" lengths of ribbon and sandwich them in the overlaps. Then tack them together by hand. (My machine couldn't handle the thickness.)

7. Put the bumper in the basket and double check your length. Cut off some if needed, then sew together the ends of the whole thing the same way as step 6.

8. Tie your finished bumper to the basket.

The last piece is optional but I think it adds so much to the overall look and functionality, especially if you plan to spend any time using the basket outside with your baby. It's the netting that can be pulled over the top.

Materials:
About a yard of a soft, gauzy, transparent material.
An 8"x45" (Depending on the width of your netting fabric) of the fabric used for the rest of the skirt.
A yard and a half of 1/2" double fold binding tape to match
A yard of 1/4" satin ribbon

1. Make sure you have enough length to go from the top of the bonnet to hang over the foot of the basket.

2. Take your 8" strip of fabric, fold in half length wise and iron all the way along. (We're making a wide binding for the top of the net.)

3. Again with the 8" strip, fold each long side up to the fold and iron. Making a double fold binding.

4. Sew the wide binding what will be the top of the netting.

5. Use your 1/2" binding to bind the bottom.

6. String your 1/4" satin ribbon through the wide binding at the top and tighten it like a draw string, knotting it and leaving ends long enough to tie it to the basket.

7. Tie the netting on the top of the bonnet, underneath the cover.

8. Wait patiently for your beautiful new baby to put in your gorgeous one of a kind bassinet.

And just because I can, here's a couple more pictures of my "helper".


This post has been included in: Teach me Tuesday and The Homestead Barnhop

Sunday, August 19, 2012

Sewing Blitz Weekend

Muscle Man has been on his annual guys trip for five days so I got to spend lots of time sewing things for the upcoming arrival of the new baby. Just nine weeks to go! As most of you know we are anticipating a move to Texas so in lieu of  readying a nursery or indulging in other nesting tendencies, I have spent every waking moment I can in front of my sewing machine, which I have a love hate relationship with. Lately, it's been mostly love since things have been turning out so well, but I have had my share of problems with the darn thing working correctly- threads bunching and breaking galore. It's a 13 year old machine, maybe it's time to get it serviced...

Here's a quick review of everything I've made thus far with direct links to the tutorials:


My little camera fits perfectly in the other front pocket, but I was using it to take the picture ;)

It went from this...
Purse Organizer I use a large Guatemalan purse as a diaper bag. There are no pockets on the inside and it's been driving me nuts lately because everything gets all mixed around inside. I love the bag though with its beautiful embroidery and didn't want to purchase another one. This took me about 3 evenings to complete and turned out great. The instructions are very clear. I did have to hand-stitch the Velcro on the dividers because it was just too thick for my machine to handle. It adds some weight to the bag but it's very sturdy and so far I love it! I added the slip pockets as suggested in the tutorial to the outside to further organize a couple of smaller items. Cost: about $8 for binding,Velcro and interfacing. I already had all the fabric and batting. Now to see if I can fit new born gear in here in addition to Little Man's stuff...I travel light so all I need to add to the current diapers, wipes, wet bag, and extra light blanket/nursing cover is a changing pad, burp cloth, extra outfit, and a sling.

To this!

Car Seat Slip Cover Little Man's old car seat was looking a little sad even after washing the cover. I decided to brighten it up a bit and finished it in an afternoon. Cost: about $15 for a half yard of minky and a yard of calico plus binding. There's plenty of extra minky to use on another project.

Hooded Car Seat Blankie I think this woman is a genius. Safety concerns aside, I think that for a winter baby this a great solution for keeping him warm. The car seat buckles run through the back of the blanket and fasten securely around baby then you swaddle him over the buckles. The only change I made was to quilt the blanket following something similar to this because I was worried that the batting would bunch and be ruined with the first wash. I finished it in one evening. Cost: about $15 for batting and a yard of dino print cotton. I already had the flannel.

4-in-one Car Seat and Nursing Cover I would like to say I made three of these in one day but my machine was acting up. I couldn't sew more than an inch without the top thread snapping. These (should) take about a half hour start to finish and sell for over $30 at One Step Ahead and Amazon. I just used a straight yard of fabric, cut about a 12 inch slit in the center, hung it on the seat and curved the corners so they won't drag, then bound the neck and edges. Easy peasy and so versatile! This can be a nursing poncho, stroller or bassinet cover too! Cost: A yard of fabric of your choice (I had coupons for JoAnnes and got this gorgeous brocade for $5. So I got 2. The other is a more neutral but very pretty light blue and beige.) plus 2 packages of binding ($4-$6).

Changing Pad Made similarly to the one in the link, but using some monkey print minky that I had with a flannel back. I only had a 12 inch piece of the minky, so I cut the flannel big enough so that I could bring it around and widen the top.  Sew the long sides first, then adjust it so it lays flat and sew the short sides, leaving enough open to turn right side out. Top stitch around the edges and voila, a 20 minute project. Cost: free.


Toy Sack/Play Mat I saw these while browsing etsy and thought it looked like such a great idea. I'm all for supporting small business but I made this for $8. It would have been $5 if I already owned a grommet tool. I already had the canvas for the back and just used a very cheap muslin for the top. I'm going to have Muscle Man draw roads and a city-scape on the muslin (I'm concerned with marker going all the way through the thin fabric so I haven't sewn it together yet) and have the older boys color it in. This one's for little man to keep his cars in. I'm going to use some of the leftover fabrics from all of the above plus some stuff in my stash to make this next for the baby. I plan to add a similar draw string so it too can be pulled together into a toy sack.

That's it for now. Stay tuned for more. I have a very long to do list. Of course while working on all of this I have completely neglected my garden for the last 5 days. I've fought the good fight well into August but at 31 weeks pregnant I just do not have the energy to chase my two year old, clean house, cook dinner, make baby stuff, and kill squash bugs. Something had to give and it was an obvious choice. Actually from the house things are still looking ok. I'm scared to go give it a closer inspection though...

This post is linked up at: The Morristribe's Homesteader Blog Carnival, and Monday's Homestead Barnhop


Saturday, August 11, 2012

Homemade "Mitata" Style Co-Sleeper/Crib

I ran across this on Amazon and thought, "Wow, what an overpriced, easy to make and very, very useful baby item!" It's billed as a co-sleeper and portable crib. I think it will be perfect to lay baby anywhere that you need protection from falling (couch, dresser for changing) or a little extra padding (floor).


Right now I'm in a situation where I'm due with baby #4 in ten weeks. Muscle man is trying to get a job transfer that would take us to Dallas which would mean living temporarily with my in-laws, teenage nephew, sister-in-law and her hubby and their newborn due in January plus my other 3 kids and 3 dogs total until we can sell our house in KC and find a new one in D. town. That's twelve people and 3 dogs in a 3 bedroom house, oh, and a cat, livin' like real Mexicans, hehe. Any who, that doesn't exactly allow much room for a crib for baby #4 so we need something small and portable to keep the baby safe. We have a bassinet too but this just seems so, appropriate, and I think would come in handy even at home. So, here's how I made my own, in one afternoon, for free since I already had everything I needed. (Even if you had to buy everything it could be done for well under $20.)

Disclaimer: Although the original product has met both US and European safety standards, my version has of course not been tested. Please use with extreme caution and as with any baby product, check frequently for any wear that could make the product dangerous to use.

Materials:
2 yds woven cotton or other non-stretchy fabric on a 50-54" bolt
heavy weight thread
30"x25" piece of batting
stuffing or fiberfill (I used almost all of a 16oz bag)
walking/quilting foot for sewing machine
needles, scissors, etc
opt: sew on Velcro
opt: water-proof insert for top sheet

When we had baby #3 I had made a woven wrap style carrier from a gorgeous batik print that I found at Hancock fabric. To make that all I did was take a 4 yard long piece and cut it in half length wise, hem the long sides then fray the ends. I used the other half for this project. Any sturdy cotton or other non-stretchy fabric would work. The dimensions given for the original were 28"x22" The width of my fabric was about 25" so accounting for 1/2" seam allowances and width changes after stuffing the side bolsters, I figured that was just about right. I measured down 30" from the end, folded it over then cut across so I had a piece about 25"x60". Then I cut 2 more 5" strips off the short end for the handles so you have two 5x25" pieces. If you're starting with a new piece of fabric, first cut it in half length wise along the fold that it comes with off the bolt. Then measure down 30", fold it over and cut just like I did, trimming off any extra from the edge to give you the 25"x60" piece. (You'll need a second 60" piece later for the top piece.) You should have just enough and a little extra off the end to cut the handles.


The next step is to fold the handle pieces in half length wise, right sides out, and press flat.


Then flip it and sew along one short side and the long side with a 1/2" seam allowance, right sides together. Turn it right side out and press, turning under the open seam so that when you sew the handle to the co-sleeper it will close the seam.


Lay out the main body of the sleeper and place the handles along the long, 30" side. You'll sew them on the outside of the bottom piece. Place them about 2 1/2" down from the long side and 4 1/2" in from the short sides on the right.


Pin down then sew securely leaving a 1/2" seam allowance under the handle for sewing the top piece onto the bottom piece of the main sleeper.


Now turn the handles down on the right side of the fabric and fold the large 25"x60" piece in half with the right sides together. Pin sides and make sure the handles are out of the seam allowance. Lay the whole thing on a piece of batting and cut around it so the batting is the same size as the sleeper.


I also straightened out that left side when I cut the batting ;-) Next, sew around 3 of the edges starting on the corner of a long side, around the folded side and the other long side. Then measure in 5" in from from each corner (from the seam) and sew along the last short open side leaving a 5" opening on each end to stuff the bolsters.


Turn the whole thing right side out and sew a vertical seam from the inside of each opening all the way to the other end, leaving a 5" slot on each side to stuff. Firmly stuff the bolsters then whip stitch them closed. If you don't know how to close a seam, here's a very simple video tutorial to follow.

Next, you need to make the top part that adds smaller bolsters along the top and bottom of the sleeper. Cut out two pieces from your remaining fabric that are about 17x30". Sew along both short sides and one long side, again with a 1/2" seam allowance. Along the open side, measure in 2" from the seam and sew along the last side, leaving a 2" opening on either end to stuff the bolsters, similar the how you did the main sleeper. Turn your piece right side out, stuff firmly and whip stitch closed.

Attach velcro if you're using it either as tabs at the corners or as strips along the short ends, whatever you prefer to hold the top piece to the bottom.

I had thought about adding a waterproof layer inside the top piece but decided to skip it and just use a regular lap pad on top. Feel free to get creative and let me know how it works for you! I'll try to remember to come back and post some action shots of our sleeper in use and let y'all know just how well it worked for us.

This post is included in the Homestead Barnhop and Growing Home's Teach me Tuesday