Muscle Man has been on his annual guys trip for five days so I got to spend lots of time sewing things for the upcoming arrival of the new baby. Just nine weeks to go! As most of you know we are anticipating a move to Texas so in lieu of readying a nursery or indulging in other nesting tendencies, I have spent every waking moment I can in front of my sewing machine, which I have a love hate relationship with. Lately, it's been mostly love since things have been turning out so well, but I have had my share of problems with the darn thing working correctly- threads bunching and breaking galore. It's a 13 year old machine, maybe it's time to get it serviced...
Here's a quick review of everything I've made thus far with direct links to the tutorials:
 |
| My little camera fits perfectly in the other front pocket, but I was using it to take the picture ;) |
 |
| It went from this... |
Purse Organizer I use a large Guatemalan purse as a diaper bag. There are no pockets on the inside and it's been driving me nuts lately because everything gets all mixed around inside. I love the bag though with its beautiful embroidery and didn't want to purchase another one. This took me about 3 evenings to complete and turned out great. The instructions are very clear. I did have to hand-stitch the Velcro on the dividers because it was just too thick for my machine to handle. It adds some weight to the bag but it's very sturdy and so far I love it! I added the slip pockets as suggested in the tutorial to the outside to further organize a couple of smaller items. Cost: about $8 for binding,Velcro and interfacing. I already had all the fabric and batting. Now to see if I can fit new born gear in here in addition to Little Man's stuff...I travel light so all I need to add to the current diapers, wipes, wet bag, and extra light blanket/nursing cover is a changing pad, burp cloth, extra outfit, and a sling.
 |
| To this! |
 Car Seat Slip Cover
 Little Man's old car seat was looking a little sad even after washing the cover. I decided to brighten it up a bit and finished it in an afternoon. Cost: about $15 for a half yard of minky and a yard of calico plus binding. There's plenty of extra minky to use on another project.
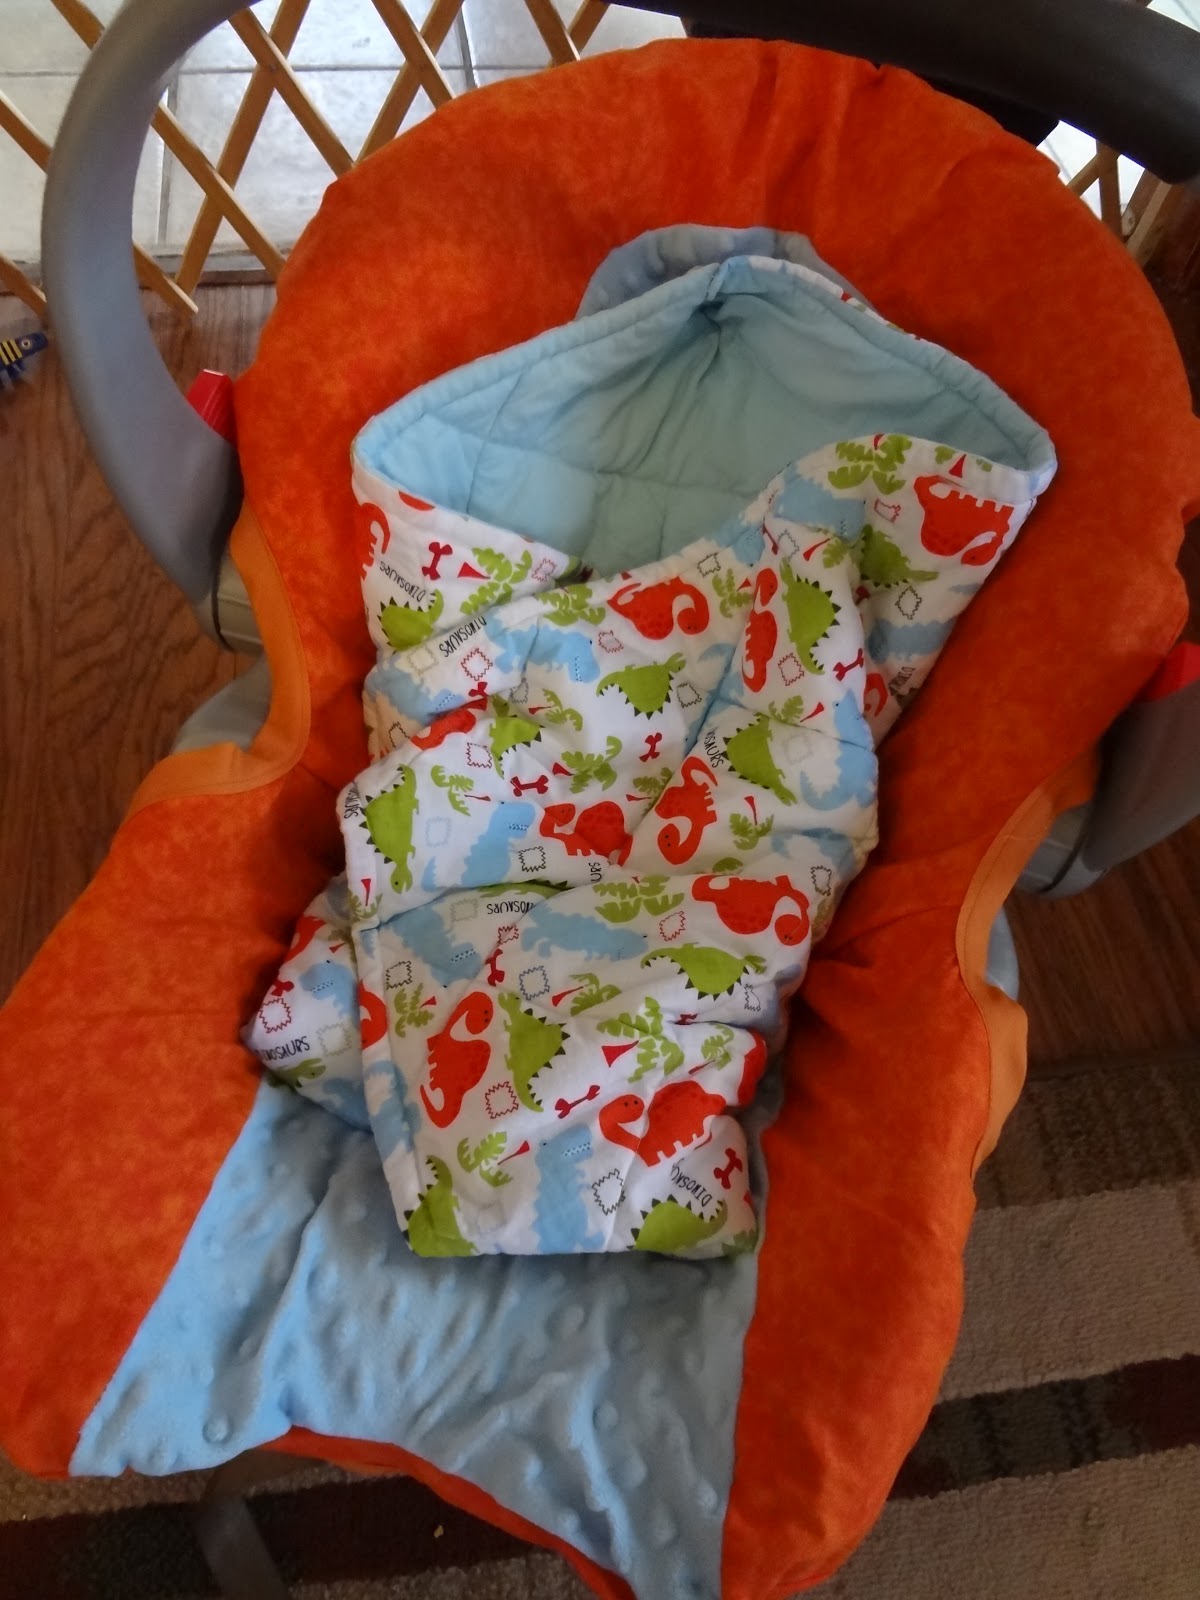
Hooded Car Seat Blankie I think this woman is a genius. Safety concerns aside, I think that for a winter baby this a great solution for keeping him warm. The car seat buckles run through the back of the blanket and fasten securely around baby then you swaddle him over the buckles. The only change I made was to quilt the blanket following something similar to
this because I was worried that the batting would bunch and be ruined with the first wash. I finished it in one evening. Cost: about $15 for batting and a yard of dino print cotton. I already had the flannel.
4-in-one Car Seat and Nursing Cover I would like to say I made three of these in one day but my machine was acting up. I couldn't sew more than an inch without the top thread snapping. These (should) take about a half hour start to finish and sell for over $30 at One Step Ahead and Amazon. I just used a straight yard of fabric, cut about a 12 inch slit in the center, hung it on the seat and curved the corners so they won't drag, then bound the neck and edges. Easy peasy and so versatile! This can be a nursing poncho, stroller or bassinet cover too! Cost: A yard of fabric of your choice (I had coupons for JoAnnes and got this gorgeous brocade for $5. So I got 2. The other is a more neutral but very pretty light blue and beige.) plus 2 packages of binding ($4-$6).
Changing Pad Made similarly to the one in the link, but using some monkey print minky that I had with a flannel back. I only had a 12 inch piece of the minky, so I cut the flannel big enough so that I could bring it around and widen the top. Sew the long sides first, then adjust it so it lays flat and sew the short sides, leaving enough open to turn right side out. Top stitch around the edges and voila, a 20 minute project. Cost: free.
Toy Sack/Play Mat I saw these while browsing etsy and thought it looked like such a great idea. I'm all for supporting small business but I made this for $8. It would have been $5 if I already owned a grommet tool. I already had the canvas for the back and just used a very cheap muslin for the top. I'm going to have Muscle Man draw roads and a city-scape on the muslin (I'm concerned with marker going all the way through the thin fabric so I haven't sewn it together yet) and have the older boys color it in. This one's for little man to keep his cars in. I'm going to use some of the leftover fabrics from all of the above plus some stuff in my stash to make
this next for the baby. I plan to add a similar draw string so it too can be pulled together into a toy sack.
That's it for now. Stay tuned for more. I have a very long to do list. Of course while working on all of this I have completely neglected my garden for the last 5 days. I've fought the good fight well into August but at 31 weeks pregnant I just do not have the energy to chase my two year old, clean house, cook dinner, make baby stuff, and kill squash bugs. Something had to give and it was an obvious choice. Actually from the house things are still looking ok. I'm scared to go give it a closer inspection though...
This post is linked up at:
The Morristribe's Homesteader Blog Carnival, and
Monday's Homestead Barnhop


 Car Seat Slip Cover Little Man's old car seat was looking a little sad even after washing the cover. I decided to brighten it up a bit and finished it in an afternoon. Cost: about $15 for a half yard of minky and a yard of calico plus binding. There's plenty of extra minky to use on another project.


Stopping by from Homestead Barn Hop, looks like you are all set and way ahead of schedule! Lord willing, we will have more kids... love the carseat cover and blanket! Blessings!
ReplyDeleteThanks Rachel! I can't wait to put our new little one in his new dressed up seat. Blessings to you too!
Delete